How to fix the non-bootable Windows issue caused by Crowdstrike?
Windows 10 / Windows 11:
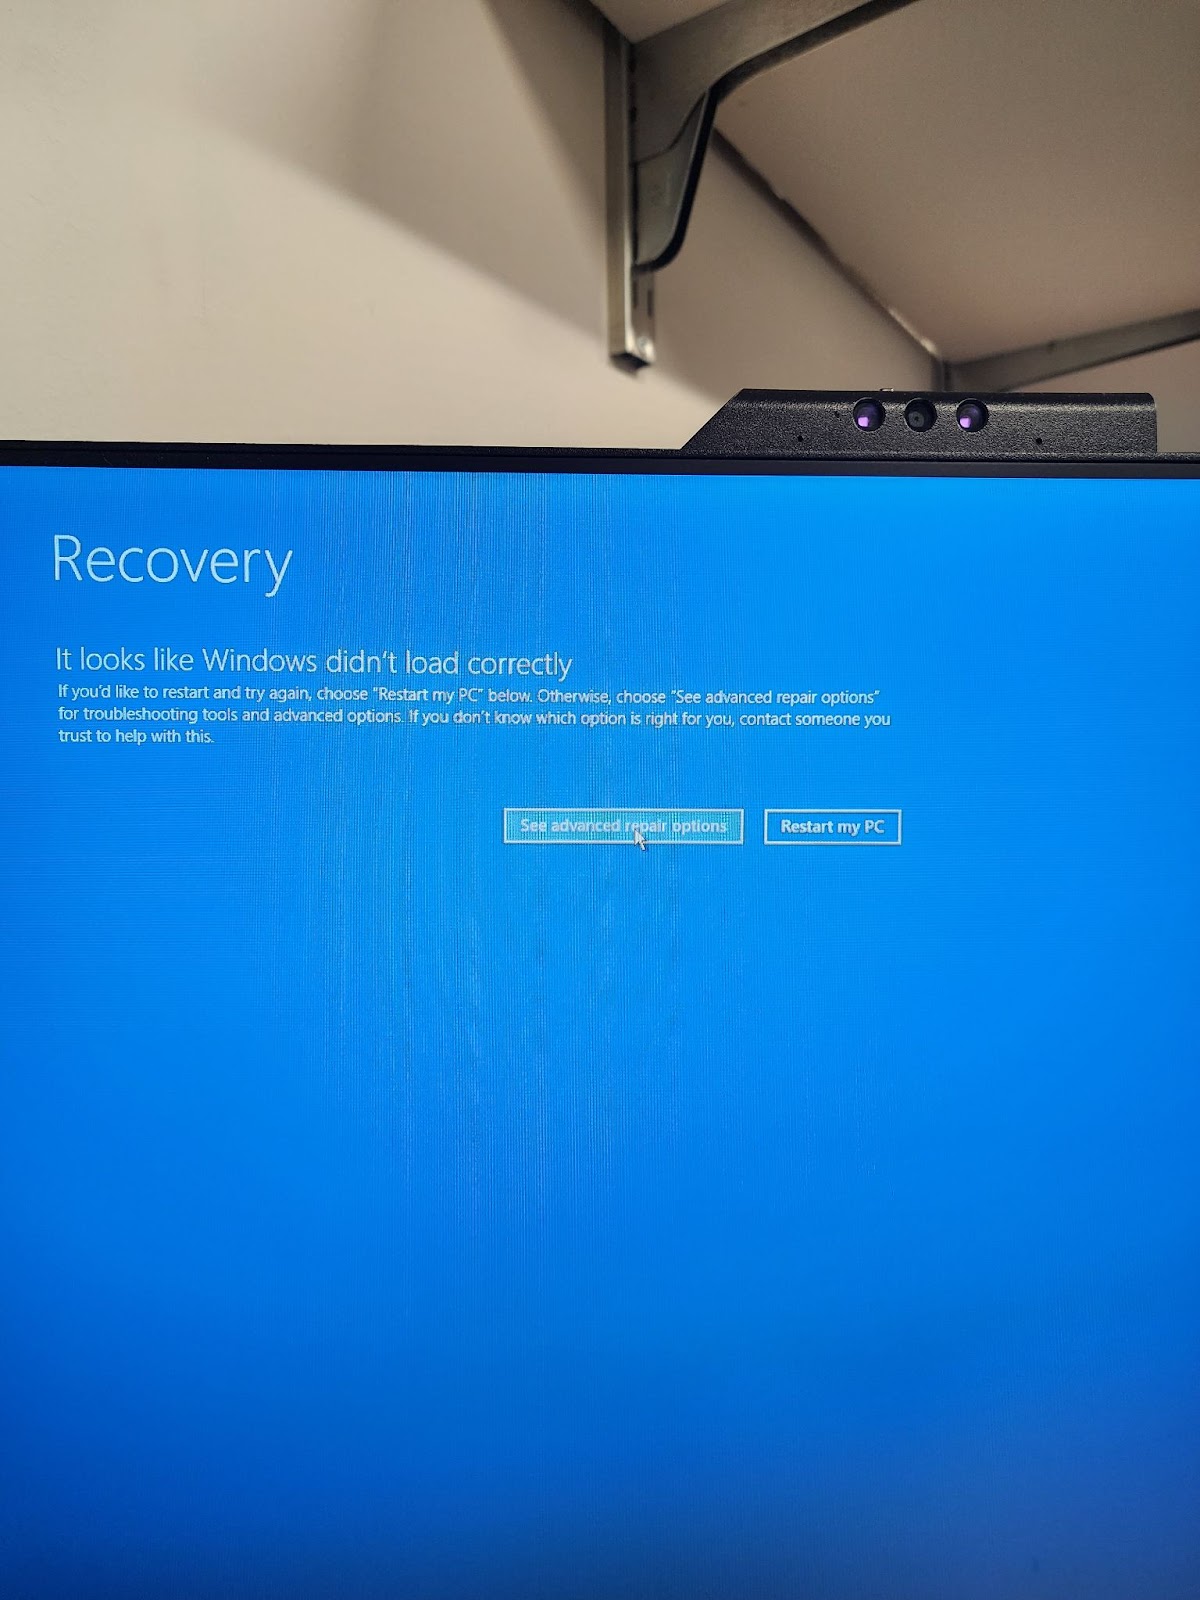
1- On the Windows recovery screen, please click “See advanced repair options”
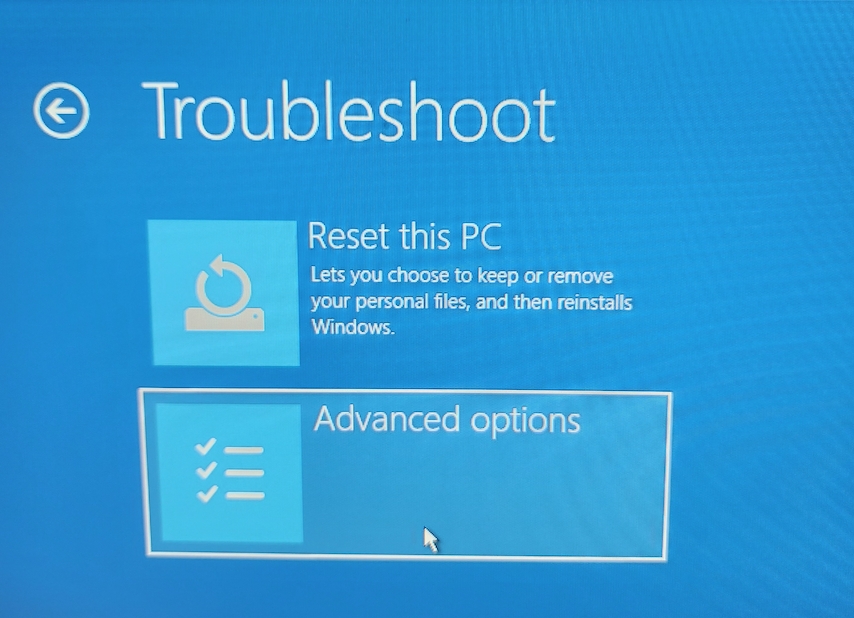
2- On the Troubleshoot window, please click “Advanced options:
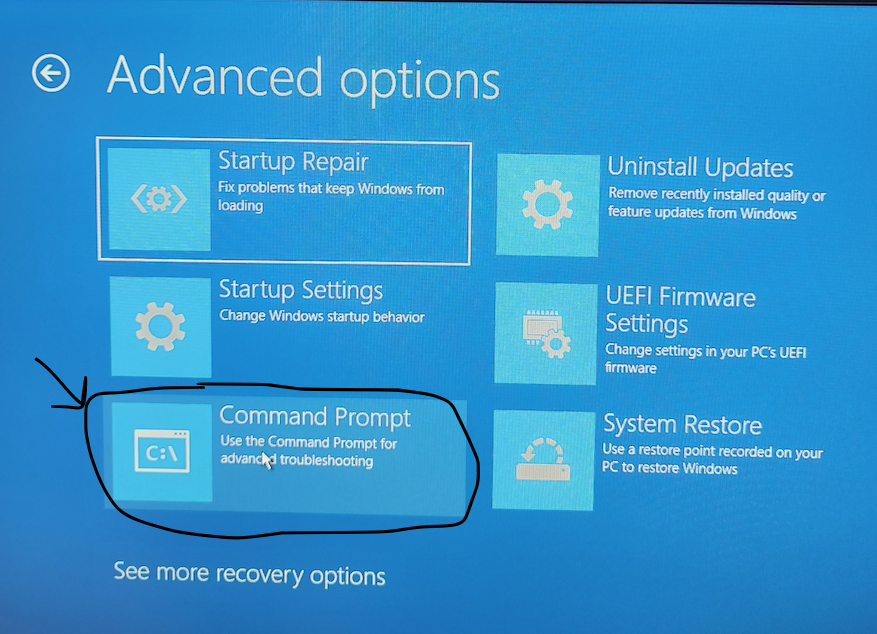
3- On the Advanced options menu, click on “Command Prompt”
4- Now the system will prompt you to unlock the drive with the Bitlocker recovery key:
Important: Please note the first 2 letters adjacent to the Drive Label at the bottom either FS or AP
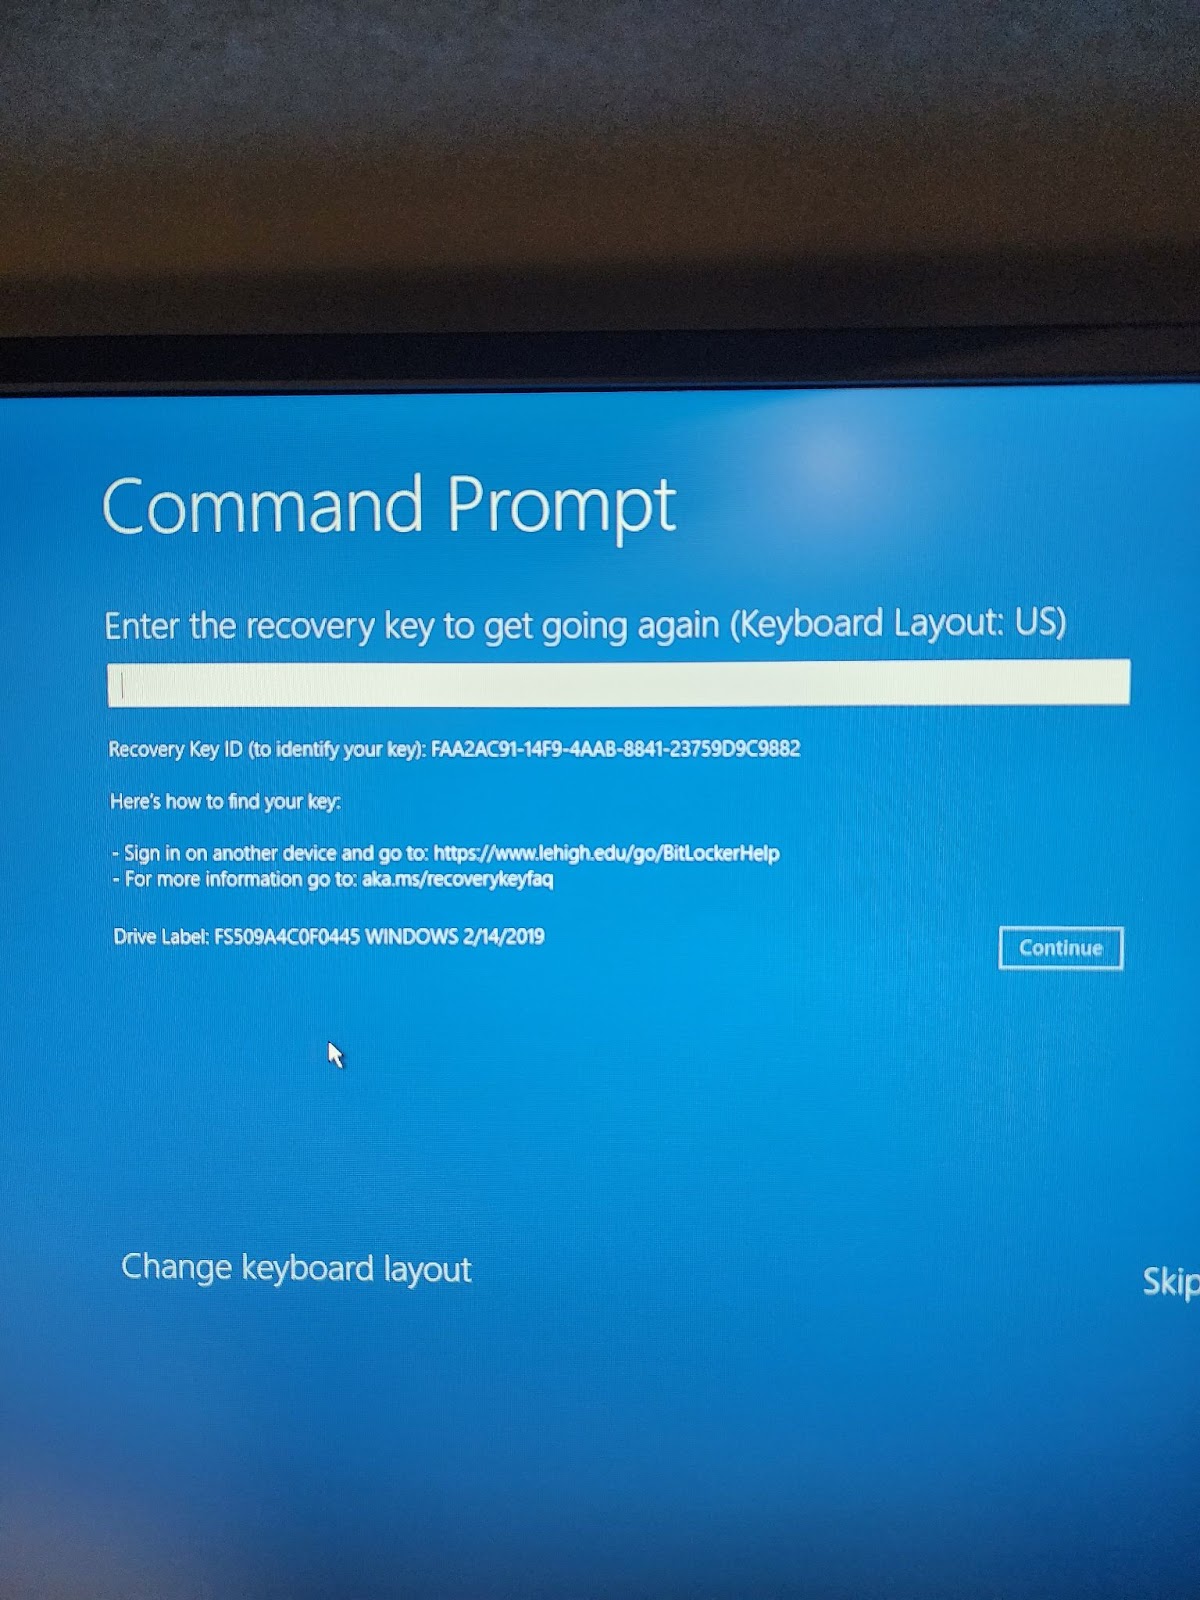
To obtain the BitLocker recovery key, use one of the following web sites:
If the Drive Label starts with FS************, use https://mbam3.lehigh.edu/selfservice
If the Drive Label starts with AP************, use https://myaccount.microsoft.com/device-list
If you have any issues getting the recovery key, please put a ticket at http://lehigh.edu/help
5- A command prompt window will show up:

6- Type this command:
wmic logicaldisk list brief

Then take a note for the DeviceID that had the Windows VolumeName. In my case was C:
See below:

7- Type this command exactly using your DeviceID letter (note the filename with asterisk)
del /p C:\windows\system32\drivers\CrowdStrike\C-00000291*.sys

Then you will get a confirmation message that says are you sure you want to delete that file?
Please press Y but make sure that you are deleting the right file.

8- Finally, restart your computer.